K E Y R E S O U R C E S :
p r o t o t y p i n g (link)
• what are we designing?
• examples
• prototype help
• materials and where to buy
• arduino code & coding
• working with the shop (D2FS)
p o s t e r s & v i d e o s (link)
• guide: videos, posters, reports
c o u r s e p o l i c i e s (link)
• my course policies
• consent form for this course
• DEA/HCD statement
c o u r s e c u l t u r e (link)
• design culture
• class organization
• societies, jobs, opportunities
|
 |
P r o t o t y p i n g
"In order to understand things, we have to build them."
– Ruzena Bajcsy, a founder of modern robotics.
W H A T A R E W E D E S I G N I N G ? - - - - - - - - - - - - - - - - - - - - - - - - - - - - - -
A: Interactive devices and the interaction between people and these devices.
- Physical ("tangible") things - not a mobile app or text display.
- An interactive device that moves, changes shape, lights up, changes color, and/or makes sounds when someone does something (near or far from it) or something happens (near of far from it).
- An experience that is fun, playful, or in some other way, affecting (stirring an emotion); an experience that impacts people's behavior.
- An experience worth talking about - like a jack-in-the-box, not like measuring devices or chairs that, only for practical purposes, turn into tables.
E X A M P L E S - - - - - - - - - - - - - - - - - - - - - - - - - - - - - - - - - - - - - - - - - - - - - - - - - -
• Student examples on this page, left-column.
• A classic example: musicBottles (Hiroshi Isshi, Tangible Media Lab, MIT).
• The lovebox, a simple, meaningful, whimsical product.
• Find inspiration here: ACM Demo Hour, MAKE, and Instructables.
M A T E R I A L S N E E D E D - - - - - - - - - - - - - - - - - - - - - - - - - - - - - - - - - - - - - - -
You will be provided the following in class:
NOTE: These electronic components are all that you need to earn the best grade on the first assignment. You are discouraged from purchasing/using additional electronics. For the second assignment, accomplished in teams, you may need to purchase additional electronics, but can divide the costs among your team members.
-
1 Grove Beginner Kit for Arduino ($23.88 from Mouser).
- 1 Grove Servo ($6.90 from Mouser).
- 1 Grove Ultrasonic Sensor ($4.30 from Mouser).
- 1 Grove Gesture Sensor ($10.99 from Mouser).
- 1 Grove RGB LED Stick (15-WS2813 Mini; $5.40 from Mouser).
- 1 Grove Switch ($3.20 from Mouser).
- 1 USB Battery Pack - 2200 mAh Capacity - 5V 1A Output ($14.95 from Adafruit).
- Panels (pre-cut) to make an enclosure for your assignment-1. If you need a different size enclosure, you can work with D2FS on laser-cutting panels to-size from digital files you generate using CaseMaker (for which you will need to know that our corrugated plastic is 0.2" thick).
You will need in class:
- Your laptop. You need your laptop in class, every class session. If your laptop is not equipped with a port to plug in a USB-A cable (that comes with the Grove Kit), then you need a USB-C hub (here's one) that plugs into your laptop's port and provides a USB-A port. Newer Mac laptops need this USB-C hub, as Macs no longer have USB-A ports on them.
You may also need:
- 1 sketchbook like this one or a comparable one found in our bookstore.
- Fabrication materials for early, rapid prototyping. These include: cardboard from shipping boxes, plastic from fruit and vegetable containers, and craft materials needed to construct your prototypes. Many of these materials you have already, at no-cost; other materials are available from the Cornell Bookstore, Michael's at the Ithaca Mall, and online at Utrecht, Blick, and Amazon.
- Fabrication materials (as needed) for high-fidelity prototyping
• Coroplast corrugated plastic is easy to work with and low-cost. I like the colorless, translucent finish found on eBay via Duco Plastics.
• Honeycomb cardboard is inexpensive and rigid enough to build furniture from.
• Acrylic sheets and other plastics are available online from TAP Plastics (cut to your size with reasonable precision) and from ePlastics (cut to size, less expensive than TAP, but less control over cutting dimensions and multiple cuts).
• Cut2Size Metals.
• Aluminum Composite Material (ACM) as in the red entry of HEB as well as my LIT ROOM project; available locally (in Syracuse) from Polymershapes, contact Kevin Passerell.
- Extruded aluminum components to build structural frames
• goRAIL is a cost-effective system of extruded aluminum sections to construct metal frames. You can purchase goRAIL in precut lengths that you assemble with goRAIL brackets and/or angles, secured by M4 screws. goBILDA and ServoCity sell the goRAIL components. With any luck, you can find everything you need from one or the other of these vendors.
- Mechanical components • You can find many useful, low-cost components on Amazon: gear and wheel sets, wheels with integrated motors, caster wheels (more and more), inexpensive robot-car kit, larger motor with encoder, plastic and aluminum pulleys, .... Ask someone in class if they want to share the purchase.
- Additional Grove and Arduino electronics components are available from Mouser with competitive pricing and quick shipping. Grove components are also available from Amazon (often at a higher price), from DigiKey, SparkFun, Adafruit, DFRrobo, JameCo, and Maker Shed, and also from Grove's manufacturer, Seeed Studio, which ships from its US warehouse.
- An inexpensive book on human-centered design methods: The Pocket Universal Methods of Design: 100 Ways to Research Complex Problems,... available from the Cornell Bookstore and from Amazon. Do not purchase the similarly titled, The Pocket Universal Principles of Design: 150 Essential....
- If you don't have access to video editing software: try Open Shop, a free video editing app for windows https://www.openshot.org/. And if you don't have Adobe suite, try Canva (free 30-day trial) and Paint.net.
H E L P W I T H P H Y S I C A L P R O T O T Y P I N G - - - - - - - - - - - - - - - - - -
• Paper•Mech
• Mechanisms (ex.)
• AI generative design tools
• MAKE and Instructables
• WOz prototyping (ex. Nest)
• CaseMaker (for which you will need to know that our corrugated plastic is 0.2" thick).
• All about adhesives and lubricants
Follow my slides [my slides] to install Arduino and the USB Driver on your computer, to begin working with Grove and Arduino coding, to fix common errors, and to use ChatGPT for solving coding and hardware issues and modifying and generating Arduino code. If you are having trouble dowloading/installing the Arduino software and/or connecting your Grove board, here is even more help for Windows users!
For more early help with this:
• View this video on Grove and review the Grove Beginners Kit for Arduino Wiki.
• Review an article and a video on how to use ChatGPT to code Arduino for you!
H E L P W I T H A R D U I N O C O D I N G A N D G R O V E- - - - - - - - - - - - - -
G E T T I N G S T A R T E D
A R D U I N O C O D E Y O U C A N C O P Y & P A S T E
Paste these codes in Arduino! Change values in the code! Modify with ChatGPT!
• A Sound Sensor controls a single LED [code].
• A Button controls a single LED and a Buzzer [code].
• A Potentiometer (i.e., Rotary Angle Sensor) controls a Servo Motor [code].
• An Ultrasonic Sensor controls a Servo Motor and an RGB LED Stick [code].
• A Gesture Sensor controls a Servo Motor and a single LED [code].
• A Light Sensor controls a
Servo Motor and an RGB LED Stick; a Switch turns the whole system on/off [code].
V I B E C O D I N G
Vibecoding is a way for non-coders to write code by entering prompts into an AI.
• ChatGPT or Claude may be enough to vibecode your Arduino project for this course. But I strongly suggest you copy & paste into ChatGPT or Claude one of my codes (from the section immediately above) that's closest to your intention, and then modify my code the way you'd like by prompting the AI. This way, you're building on code that already works -- a solid head-start! See my slides for using ChatGPT (or Claude if you prefer) to accomplish this. Again, as above, you can also review an article and a video on how to use ChatGPT to code Arduino for you.
• circuito.io (it's free!), while not strictly an AI tool, is a free, visual-programming app that allows you to drag-and-drop Arduino (and Raspberry Pi) components you select from a menu, which then produces for you the breadboard prototype (wiring, circuits, components), the code for that system, and a shopping list of components.
• Cirkit Designer (it's free!) helps you code, design hardware, and simulate your prototype with Grove/Arduino, Raspberry Pi, and ESP32. (Medium's review).
• Arduino AI Assistant, from the developers of the Arduino IDE (software), is strictly focused on Arduino projects. It offers a free trial and then a low-cost "maker" plan.
• Gemini CLI (it's free!) requires a bit more from you in setting it up.
• Loveable (Medium's review) is great for developing websites or screen-based apps.
B U I L T - I N A R D U I N O C O D E
• You can find lots of code already built into the Arduino software (IDE): open Arduino, select File > Examples, select an example and it will open in an Arduino window, ready to upload to your Arduino board!
• All of the built-in examples are thoroughly described here. Follow their logic to
construct the code for your project.
• An Arduino Library LIst for Grove components. Find code for lots of modules here!
D E E P E R D I V E I N T O G R O V E & A R D U I N O
•
Seeed Studio's open source community (here and here) and Help Forum.
• GitHub is the open-source repository of code, including code for Grove Arduino.
• 15-Video Tutorial for Arduino (free) from Jeremy Blum, Cornell alumn!--great!
H O W - T O E L E C T R O N I C P R O T O T Y P I N G
• How to convert your servo for continuous rotation (how to guide).
• How to use a cheap stepper motor
with a ULN2003 driver (guide; buy at Amazon)
• How to breadboard prototype; about basic electronics.
•
How to work with wire: stripping, soldering, crimping, braiding it.
• How to extend (chain together) Grove kit wires.
• How to add an LED strip: solder it to a Grove connector; power it [1,2,3], and code it.
• How to make two Arduinos communicate wirelessly using Blynk or NRF.
• About LiDAR sensors - measure distance and generate/identify objects and gestures.
• Use MIT App inventor to create an app that interacts with or controls your device.
•
About using relays - "electronic switches."
• About making Arduino robots.
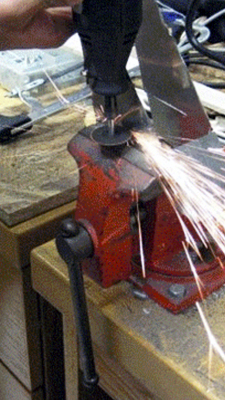
W O R K I N G W I T H T H E S H O P ( D 2 F S & d H I V E) - - - - - - - - - - - - - -
This course does not require the use of digital fabrication to produce the prototype. You can manually produce all deliverables for this class. It's however easy to digitally fabricate components for your prototypes. Our partners for this course are the staff or our very friendly and capable Digital Design Fabrication Studio (D2FS) on LL2 in HEB, email ched2fs@cornell.edu
•
You can easily draw a 2D file of your component(s) for laser cutting by D2FS staff. Use Adobe Illustrator (save as ai) or use a CAD program like Google SketchUp (save as DXF) which is free and very simple to use.
• Preparing files for 3D printing can be more difficult, but if they are simple geometries, you can again use SketchUp. If you need a more complex form, you might begin by seeking the file you need from repositories of 3D printing files like this one and this one.
If you need to create a form anew or modify an existing file, the standard application to do so in industrial design/architecture is Rhino, and in Engineering, Solidworks. Typically, files are saved as stl for 3D printing. Work with the D2FS staff on your 3D printing projects.
• Once you've saved your file for laser cutting (ai or DXF file) or 3D printing (stl file), "Request an Appointment" to submit your file and specifications for digital fabrication and the staff will do the work for you, preparing the fabricated pieces you requested. Make sure to complete the online appointment form carefully with precise specifications. Provide the staff with laser-cutting sheet sheet materials to laser cut ahead of your request. 3D printing filament is provided free of charge.
•
Work with the D2FS staff (ched2fs@cornell.edu) - they are here to help you!
• dHIVE (Design Hub for Innovation, Visualization and Exploration) is a 2,500-square-foot design studio used for classes, group work, individual study, developing and testing prototypes, and digital fabrication. Located in MVR 1101, the space is accessible 24/7 to students enrolled in DEA and FSAD courses in the department of Human Cantered Design. It offers two 3-D printers and a laser cutter that students can use once you are trained on them by D2FS staff (ched2fs@cornell.edu). Contact them to schedule the training!
|
 |